Grunge it up card

Click on the image and see how this was made. There is a video tutorial of the process.

In My Garden card

Click on the image and see how this was made. There is a video tutorial of the process.

Timeless Treasure art journal spread

Click on the image and see how this was made. There is a video tutorial of the process.

Father's day card

Click on the image and see how this was made. There is a video tutorial of the process.

Distress it card

Click on the image and see how this was made. There is a video tutorial of the process.

Wednesday, July 30, 2014

12 tags of 2014 - July

Hi everyone,

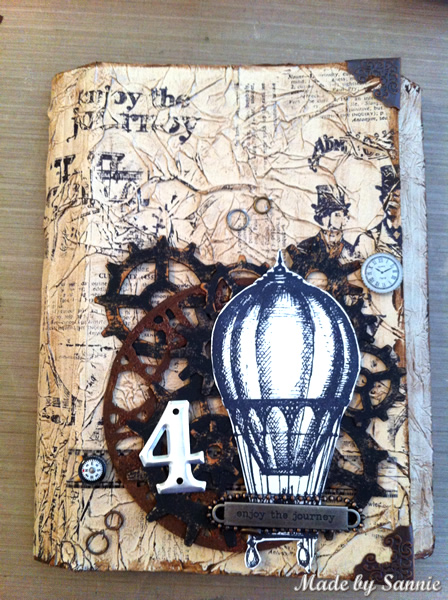
Have you seen the July tag of the 12 tags of 2014? I think it's a beauty! That seahorse is really cool. Unfortunately I don't have that die and have therefore chosen a different theme, a summery day in Paris!


That sand technique Tim did, is so cool!And I wanted to try it too. It was a bit of fiddling with the wet sand, but I think it turned out okay. The sand has a bit of a different color, but oh well, there are so many different colors of sand. Despite it's made with Glossy Accents and adhered wiht it, it still crumbles off very easy. Need to come up with something that will hold it in place better.


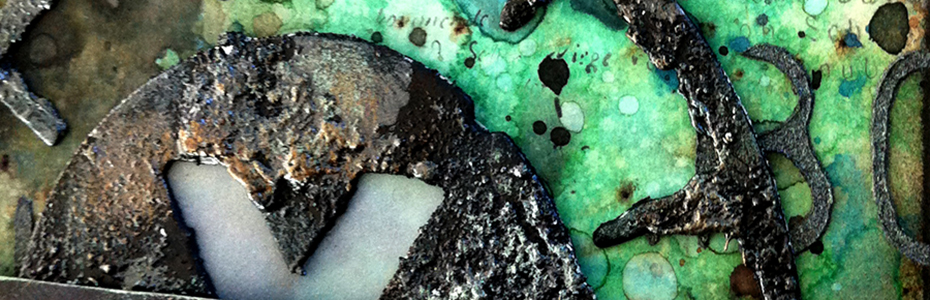
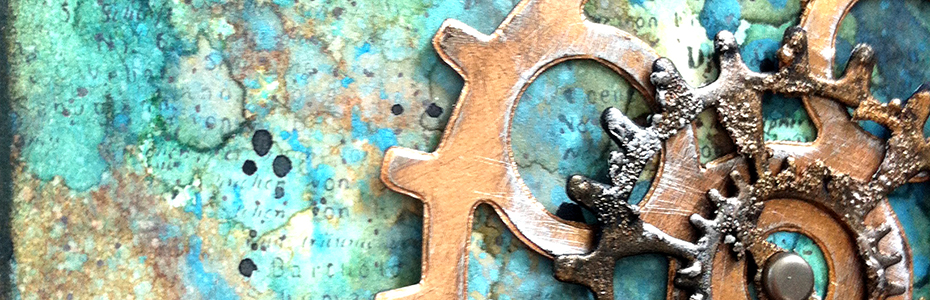
The Eiffel Tower I painted with Weathered Wood and Brushed Pewter Distress Paint. After sanding it, I've worked with Black Soot Distress Ink. Since it came in contact with Rock Candy Crackle Paint the color became a bit darker. But I like that.


Thank you for stopping by! Love to see you next time!

Hugs,
Sandra

Monday, July 28, 2014

J is for Jump Rings

Hi everyone,

Are you also enjoying the nice summer weather? Great! There's a new Simon Says Stamp Monday Challenge, and this time the theme is "J is for ...". July, jewelry, journaling, jars, junk yards, joy ...? Let's get creative with the J!


I was thinking about Jump Rings. I use these only to attach embellishments, but why not use it as a embellishent?


I started with a piece of Manila cardstock. I've inked the edges with Pumice Stone Distress Ink. The text is also stamped with Pumice Stone. This gives it such subtle and calm background. To give it a little more interest,  I made some Bubbles with Pumice Stone yet again. I think there was some ink left on the stencil, so the color looks slightly different.


The Papillons I stamped with Archival Jet Black and over that I adhereed a strip of Burlap Paper stuck, so it just seems like a book binding. It needed a bit of color and I colored a piece of Jute twine with Broken China Stains.
The sentiment is from the exclusive Simon Says Stamp On The Edge stamp set. And finally the stars of the card, the Jump Rings, they are glued with Tacky Glue.

50dollar_voucher_600px
To join in all you need to do is make a project that fits this weeks challenge and you can be the winner of the $50 gift voucher that our amazing sponsor Simon Says Stamp offers. This prize will go to a random entry. So go over to the Stamp and Show Monday Challenge blog, let the DT members inspire you and join in the fun!

Thank you for stopping by! Love to see you next time!

Hugs,
Sandra

Sunday, July 27, 2014

CC3C #7

Hi everyone,

Tim has so much amazing techniques, and for challenge #7 of CC3C we get to play with the Painted Industrial technique from page 46. This time it's sponsored by Inspiration Emporium!

 
I have done the Painted Industrial technique before and I think it's so cool! It gives such a different effect and even dimension to your project! These gears, I just got them, and I absolutely love them. Because of the Metal Foil the embossing really shows, which it's great for Painted Industrial technique.


The edges, I stamped with my new Bo Bunny Stitches stamps. Love that they look almost real! Fab!


Thank you for stopping by! Love to see you next time!

Hugs,
Sandra

Monday, July 21, 2014

A mid-summer challenge

Hi everyone,

The summer is halfway, and Simon Says Stamp Monday Challenge has a very fitting theme to go with it: a mid-summer's challenge.

A challenge this time of year would be to brave getting a heat tool involved when my crafting space is nearly hot enough to melt embossing powder on its own! Well perhaps not quite that hot, but mid-summer is a time of hot temperatures, long days, longing for more time spent by the water, and vacation. Whether your creative mind wants to take a vacation or be inspired by Shakespeare; play with a Farmer’s Market inspired paper line or stamp into a starry night frenzy - we challenge you to create and share with us.


When I think of (mid-)summer, I think of bright beautiful colors like in colors of flowers. That was my starting point. I almost never use Specialty Stamping Paper, and I wanted to experiment with. With this paper you can basically use any type of ink or paint. So why not play with Alcohol Inks?! Something I don't use often as well.


Since alcohol inks are quite intense, one drop is enough. I've used one drop of Raspberry, Sunshine Yellow and Gold Mixative Alchohol Inks. Along with Bleding solution. Andd mixed it a bit, not too much but enough that it's not concentrated just in one place.


I swiped the Specialty Stamping Paper through the colors and it doesn't look really nice yet. The special qualities of the paper is that it doesn't soak in the colors, and that it let you reactivate the inks with blending solution, so you can manipulate it a bit. It's tricky to know when to stop, I had that problem with my first attempt. This is my second.


It needed more yellow, the pink was a bit much. Therefore I applied some Mustard Seed Distress Ink with the mini bleding Tool to make it more yellow. This way  alchohol and Distress ink work perfectly together.

50dollar_voucher_600px
To join in all you need to do is make a project that fits this weeks challenge and you can be the winner of the $50 gift voucher that our amazing sponsor Simon Says Stamp offers. This prize will go to a random entry. So go over to the Stamp and Show Monday Challenge blog, let the DT members inspire you and join in the fun!

Thank you for stopping by! Love to see you next time!

Hugs,
Sandra

Guest designing over at a Vintage Journey

Hi everyone,

A while back I was approached by Brenda of a Vintage Journey with the question if I wanted to be a Guest Designer. Well, I didn'tt have to think about it at all! Of course I do! What an incredible honor! I was thrilled and very excited! This time the challenge is hosted by Annie and the theme is "Dies and Distress". Two of my favorites in crafting! About two months back I went to Barcelona for a couple of days as a citytrip. What a beautiful city that anyway and I wanted to make a little something to that gave an impression of my trip (I also will make a full album with lots of photos in the future :)). And the new Folios from Tim Holtz are ideally suited for it!


Steampunk is so cool and I love it, and that became the theme for my folio. To get lots of texture a bit of a grungy look I covered the outside of the folio with tissue paper. I wrinkled it and adhered with Multi Medium Matte.


After it was completely dry, I painted the inside and outside with Tan from Studio. The paint is old and got a bit thick, so I diluted with water, which is better to do in this kinds of projects anyway. So the creases will remain and you don't need as much paint to paint into all the creases.


To give it an aging effect I took a dry brush and dabbed some Espresso Paint Dabber on my craft sheet and started to apply the paint. This is a patient job (which is very difficult for me;)), and it's important that you don't get too much paint on the brush.


The Gadget Gears and Mini Gears I cut out of recycled cardboard and then painted black. Once the paint was dry, I sanded them with the Sanding Grip. The sanded pieces I've inked with Walnut Stain or Rusty Hinge Distress Ink. Love that look! So simple and so cool!


Uhh well yes... and then I stopped taking pictures... It's so difficult for me to take pictures of every step. I'm really involved in the creative process, that I forget to take pictures along the way. But I will describe what I did next.
With some stamps I made the background more interesting. Since the surface has a lot of texture, I didn't put the stamps onto an acrylic block but just stamped with them by hand. So I get a better impression.
The edges are done with some Espresso Paint Dabber. The Weathered Clock I painted brown and while the paint was still wet in a few places, I sprinkled some Rust Embossing Powder over it. Quickly melted it with the heating tool. One of my favorites stamps is this balloon! I left t white so it gives a nice contrast.
Then the layering it was time to get to the layering of the elements and use some embellishments here and there.


The inside, I also painted with the Tan paint and stamped it ​​with different stamps. In the folio you will get an insert that you can use however you please. I saw a video when these were released and they advised to adhere the insert at the end. Now I understand why...


I like transparencies very much and I love washi tape too. Why not put them both together? This way the content is also protected.


Below are some pictures of the finished piece.


I hope you liked tutorial, although I didn't have a picture of each step. I want to thank everyone at a Vintage Journey for the invitation to be a Guest Designer! I had a blast!


Thank you for stopping by! Love to see you next time!

Hugs,
Sandra

Monday, July 14, 2014

Silly grungy face

Hi everyone,

This Monday it's all "about a face" at the Simon Says Stamp Monday Challenge. Guess your creative mind probably is working on full speed with this one. Whether it's a face of a person, an animal, a clock or anything else that has a face. Get creative!


The background of this tag I made with the technique I learned by Tim's 12 tags from the month of April. I think it's such a cool technique with the washi tape and Distress Paint over it. It's so different than I normally use my washi tape. And I had so much fun last time with this technique that I wanted to use it again.


For my tag, I have chosen the male of the Purveyor stamp set. I think he looks so serious, I thought that could use a funny glasses made out of washers I got from the hardware store. Hihihi.
I stamped him on a piece of cardboard that I painted bluish gray with Weathered Wood Distress Paint.  While the Jet Black Archival Ink was still wet, I've poured some Frosted Crystal embossing powder over it. Because I didn't want to blow all the powder away, I'm heated it from the bottom with the heating tool.


The Purveyor stamp set has more beautiful stamps, and have stamped the number and Miscellaneous with Versamark and coated it with black embossing powder. To pick up the blue color in the Weathered Wood, I have colored the collar with Tropicana Teal Color Shine and made some drops with it.


50dollar_voucher_600px
To join in all you need to do is make a project that fits this weeks challenge and you can be the winner of the $50 gift voucher that our amazing sponsor Simon Says Stamp offers. This prize will go to a random entry. So go over to the Stamp and Show Monday Challenge blog, let the DT members inspire you and join in the fun!

Thank you for stopping by! Love to see you next time!

Hugs,
Sandra

Saturday, July 12, 2014

CC3C #6

Hi everyone,

Do you also have lots of fun with the CC3C? This week it's sponsored by The Funkie Junkie Boutique! For this challenge we were asked to go to page 37 of Compendium of Curiosities III. The challenge is Altered Burlap Panel.

Unfortunately I don't have a burlap panel, but I do have Burlap Paper. So I adhered it onto a tag, and gave it my own twist. I had the burlap completely covered with Tissue Wrap and Iwanted to show some bits of the burlap when it was already dry. What a super glue that Multimedium is, with great difficulty I made two small corners peep through.


The Fanciful Flight Butterfly is so beautiful, I've coverd the top part of the wings with Rock Candy Crackle Paint. Unfortunately my Crackle Paint is really thick and old, that I have to dilute it with quite a bit of water, what results that it doesn't adhere to the surface very well. It's quite a cool effect, the crackles look a bit like the  the delicate veins on the wings of the butterfly.


Thank you for stopping by! Love to see you next time!

Hugs,
Sandra

Monday, July 7, 2014

Big bold doily flower card

Hi everyone,

At the moment I'm enjoying a few weeks of summer vacation! Though the weather looks more like autumn with rain, rain and more rain. Which makes a good reason to get creative!
About being creative, it's Monday and that means a new Simon Says Stamp Monday Challenge! DT member Anna-Karin suggested a create your own flower(s) from scratch challenge,  and DT leader May has made the challenge wider by making it into a "from scratch" challenge. So anything that's made from scratch counts!

I stuck to the original idea, and made a flower made ​​in kind of Finnabair style but with my own spin on it. I recently followed a couple of workshops from her and they were amazing! She is so good at building up layers, she does that so very beautiful. It looks really simple, but for me it's quite the challenge and I know I have much to learn and expirement.


Currently I'm very into the doilies. These are really cute and well suited to make flowers with. So I used doily die cuts, but made also a transparent doily ​​with StazOn Ink and a doily stamp from Prima.


This card I made for my boss, who recently had surgery. On the inside I binded with a jute string a few blank sheets together and gave those black pages some interest with Distress Ink and a stencil. Unfortunately I forgot to make a picture of it and the card is already in the mail.


50dollar_voucher_600px
To join in all you need to do is make a project that fits this weeks challenge and you can be the winner of the $50 gift voucher that our amazing sponsor Simon Says Stamp offers. This prize will go to a random entry. So go over to the Stamp and Show Monday Challenge blog, let the DT members inspire you and join in the fun!

Thank you for stopping by! Love to see you next time!

Hugs,
Sandra

Friday, July 4, 2014

Happy 4th of July and SSS Sneak Peek

Hi everyone,

Happy 4th of July to all my American blog friends! Wishing you a most wonderful day! I don't have a 4th of July themed card to share, but something else that's fun also.
The other day I got a surprise in the mailbox! A new stamp set with matching die set from Simon Says Stamp called Road Trip! Both will be released soon along with other new products (check out SSS blog, where the official release will be posted!). But I've got a sneak preview for you now. How much fun is that?

I couldn't wait to get started, so I made this card. It's not my usual style, but it was so much fun to play outside of my comfort zone. 


The clouds are made ​​with the cloud die cut from the exclusive Simon Says Stamp Talk Bubbles 2 die. I cut off the talking bubble bit so it was a normal cloud again. With Broken China Distress Ink I built up the clouds.


The middle part you almost can't see, represents the roadside. This is made with Peeled Paint and the Stripes stencil.
The road is colored with Pumice Stone Distress Ink and the Crackle stencil.
The sun, the car, the suitcases, the stripes on the road and words the Road Trip! are all stamps and die cuts from the new Road Trip! stamp and die set!


Thank you for stopping by! Love to see you next time!

Hugs,
Sandra