Grunge it up card

Click on the image and see how this was made. There is a video tutorial of the process.

In My Garden card

Click on the image and see how this was made. There is a video tutorial of the process.

Timeless Treasure art journal spread

Click on the image and see how this was made. There is a video tutorial of the process.

Father's day card

Click on the image and see how this was made. There is a video tutorial of the process.

Distress it card

Click on the image and see how this was made. There is a video tutorial of the process.

Sunday, June 30, 2013

12 tags of 2013 - June

Hi everyone,

I'm just in time to join the 12 tags of 2013 for the month of June. It's all been so busy around here and actually that still is the case. But fortunately I found a little bit time to participate. I haven't missed a single one yet and I'm not about to start now! What a gorgeous tag Tim has made for us. With this tag we can go crazy with lots of different Distress techniques. Also he used lots of Distress Products: Distress Ink, Distress Stain, Distress Paint and Distress Markers.

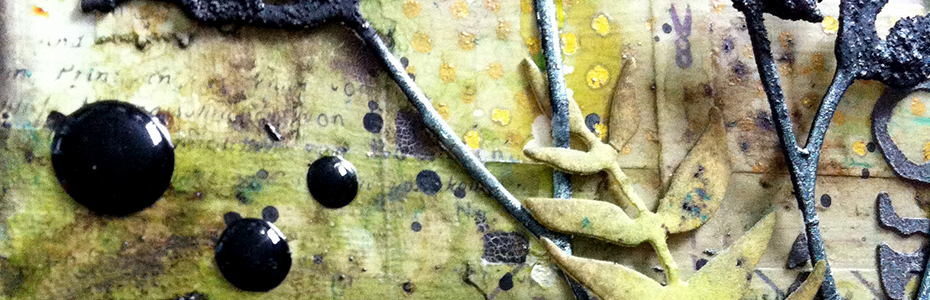
I love the background with 3 different products and colors. Don't think I would ever have thought of trying it. I used the same colors and products for my background. I must admit that I rarely use the Distress Markers, and unfortunately my Picket Fence Marker completely dried out. I tried to save it, first with water and then with Ink Refresher but unfortunately, it doesn't work anymore. But I had so much fun coloring with them. I need to do that more often!


Thank you for stopping by! Love to see you next time!

Hugs,
Sandra

Monday, June 24, 2013

Striped pattern card

Hi everyone,

A new Monday means a new challenge at Simon Says Stamp and Show! And this time the challenge is stripes and plaid. Such a fun theme. I wanted to create a custom striped pattern and therefore used lots of different washi tape!


The other day my best friend had his birthday and he now belongs to the club of the thirty-year-olds. 30 is a great milestone and that shouldn't pass unnoticed! That's why I made this card to congratulate him with this jubilee year.


As a base, I used a scrap piece Kraft cardstock and cut it to size. I made the horizontally striped pattern background by placing strips of washi tape right below each other.


To make it a bit more complete, I made the edges black with the Pitch Black Paint Dabber and I placed some Wooden Stars here and there on hte card. Of course, my new favorite the label letters had to be part of this card!


In order to give the card a little more color I mixed in some Pool Paint Dabber to make the white Modeling paste blue and made ​​some texture applied using a stencil.


To join in all you need to do is make a project that fits this weeks challenge and you can be the winner of the $50 gift voucher that our amazing sponsor Simon Says Stamp offers. This prize will go to a random entry. So go over to the Stamp and Show Challenge blog, let the DT members inspire you and join in the fun!

Thank you for stopping by! Love to see you next time!

Hugs,
Sandra

Monday, June 17, 2013

Get Krafty

Hi everyone,

Is it really true a new Monday has arrived already? Well then, that means you can get started with a new challenge from Simon Says Stamp and Show again. And this time an extra special one, because I came up with it! The challenge is to use Kraft in your project. It can be a lunch bag, a Kraft tag, an old cardboard box that you tear to pieces or use the color that looks like Kraft. I hope you find it a fun challenge and you will join in!


I'm a very big fan of the Kraft color as you probably know, so I thought it was a great idea to do my travel album with that lots of Kraft. I took my trusty canvas board pieces again packed and made them the cover. I covered them with the beautiful Classic Volume # 3 paper line from Studio Calico. Gorgeous neutral paper which goes  very nice with Kraft cardstock.


The cover is embellised with a lot of washi tape, a buckle that I got from the lovely Maria (thanks again!), the Jumbo Number 4 of Pink Paisley and so much more. The Mini Rosettes I first stamped with the Mixed Media stamp of Tim Holtz and that gives it a very nice effect. I'm so in Neon Pink at the moment. What a fabulous color that is. Very nice accent color for this album.


The inside consists of four different parts. On the left a bound booklet and a photo folder that I've made out of a cardboard box. Fot the book I used the paper from the Classic Volume # 3 , and out of the remaining pieces I made more pages using the scrap pieces and adhered them together with washi tape. So I had another 10 extra pages to stick pictures onto. I'm really the kind of girl that puts as many pictures in travel albums as I possibly can.  That's a real challenge. I also have pages where I made flaps with the pictures so that a page can hold 5 to 7 photos, instead of only 2 photos. With me the album is about the pictures and the journaling, not about a lot of embellishments.


The photo folder is made from an old cardboard box that I cut to size. To keep it closed I've used magnets. This ensures that it stays closed and it's easy to open.
On the bottom of the folder I've made a harmonica fold and adhered 5 pages of the fabulous Classic Volume #3 paper. This folder is themed fashion, as we shopped a lot during our trip.


On the right I used binding rings and I made a tray with compartments that contains the brochures, maps and other documents can I have collected this trip. What was a cool station Arts et Métiers. It looked much like a steampunk submarine. So gorgeously done with the big gears and the stuff. Very impressive.
Okay, back to the album. These pages are made out of the Classic Volume #3 paper pack. And I cut at different lengths for a playful effect. The taps I made with the Corner Chomper. Such a fun tool!


To join in all you need to do is make a project that fits this weeks challenge and you can be the winner of the $50 gift voucher that our amazing sponsor Simon Says Stamp offers. This prize will go to a random entry. So go over to the Stamp and Show Challenge blog, let the DT members inspire you and join in the fun!

Thank you for stopping by! Love to see you next time!

Hugs,
Sandra

Monday, June 10, 2013

You've moved button

Hi everyone,

A new Monday has arrived and this week Simon Says Stamp and Show a new challenge for us too. Buttons are the main focus this week. Whether you use real buttons, you have a die of buttons, or you have a nice stamp with buttons, all is possible.


My best friend Lein moved from an apartment to a beautiful house in a town nearby.And she told me that she needed about 250 boxes to move all her stuff! That gave me the idea to create a card inspired by a moving box. I took a cardboard box and cut it to the size of a card. Then I started pulling the top layer so the layer corrugated shows.


The WordPlay letters I painted blue, then gently go over in one direction with the black paint dabber, so that not everything gets covered. And last I went over Teal Color Shine Spray.


The buttons are from Doodlebug, aren't they pretty?


To join in all you need to do is make a project that fits this weeks challenge and you can be the winner of the $50 gift voucher that our amazing sponsor Simon Says Stamp offers. This prize will go to a random entry. So go over to the Stamp and Show Challenge blog, let the DT members inspire you and join in the fun!

Thank you for stopping by! Love to see you next time!

Hugs,
Sandra

Monday, June 3, 2013

Sannie's Schedule

Hi everyone,

It's Monday once again and even a new month has arrived. Hopefully June will bring lots of great weather and sunshine! Well okay, enough about the weather and lets move on to the new challenge from Simon Says Stamp and Show. The theme of this week is the S is for ... You can decide what the S stands for yourself. Such as stars, simple, shabby, sunshine, stripes, spray, stickers, stamps, etc. As long as it starts with an S you're good to go. Please let us know what S word you've used.

My S is for ... Sannie's Schedule. In otherwords my calendar. I find myself pretty organized, the only thing is that I write everything down on little notes, and sometimes I loose one or two of them... So I thought it will be a good idea to make a binder with my schedule in it. Here I can keep all my creative things in need to do. Such as keeping the birthdays and therefor a reminder that I need to make a birthday card for that person but also the challenges for Simon Says Stamp and Show I need to do. This way I keep my thing to do in order.


I always like to make my own binders and albums. Generally I use canvas boards for them. These are really sturdy and ideal as a cover. They are available in different sizes and I make my album or binder at the size I can get. It's almost undoable to make them another size. For spine I use 1mm thick cardboard which I cut to the size I need  and paste multiple layers on top of eachother. Then I cover all the canvas boards panels with Kraft paper and get inky with lots of different stamps. All with black ink. Then I glued the pieces together and it was time to decorate the cover.


Well how will I do the binding for the pages? Let's see. The other day I saw a very nice binding technique on the blog of Tammy Tutterow that I wanted to try. Perfect for my schedule!


If you like you can download the Pdf's I made for the inside here and here.


To join in all you need to do is make a project that fits this weeks challenge and you can be the winner of the $50 gift voucher that our amazing sponsor Simon Says Stamp offers. This prize will go to a random entry. So go over to the Stamp and Show Challenge blog, let the DT members inspire you and join in the fun!

Thank you for stopping by! Love to see you next time!

Hugs,
Sandra