Grunge it up card

Click on the image and see how this was made. There is a video tutorial of the process.

In My Garden card

Click on the image and see how this was made. There is a video tutorial of the process.

Timeless Treasure art journal spread

Click on the image and see how this was made. There is a video tutorial of the process.

Father's day card

Click on the image and see how this was made. There is a video tutorial of the process.

Distress it card

Click on the image and see how this was made. There is a video tutorial of the process.

Wednesday, August 29, 2012

Steampunk Halloween

Hi everyone,

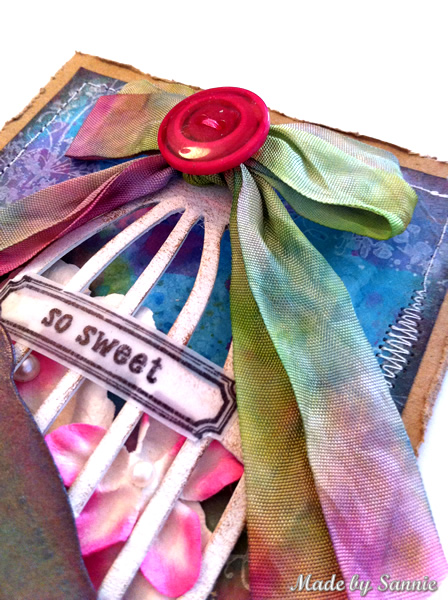
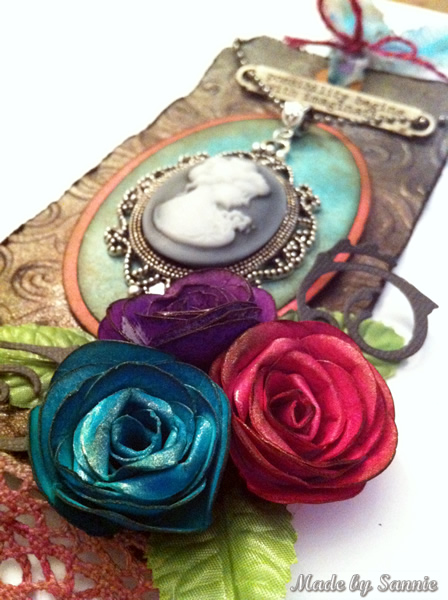
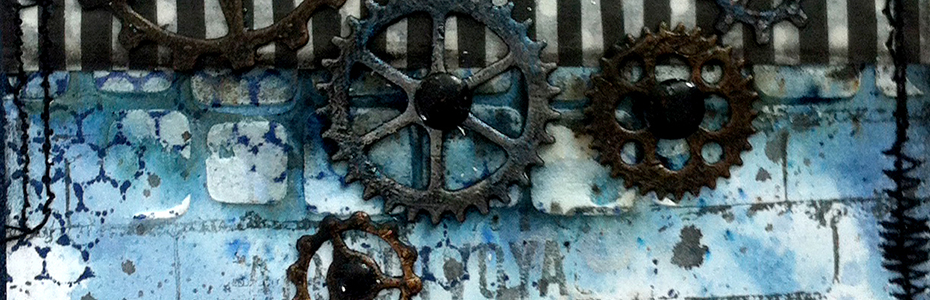
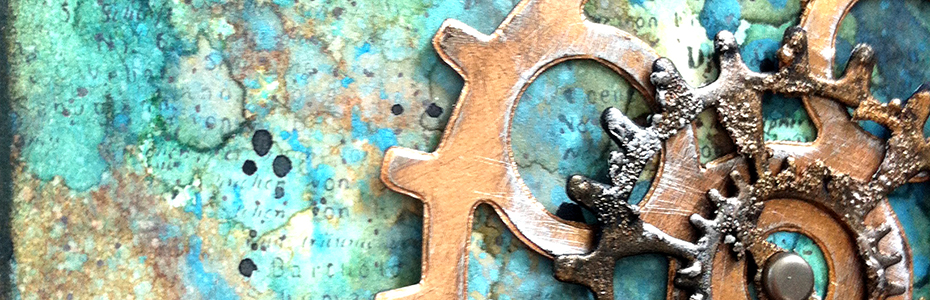
More and more I get into the Halloween mood. I think it is a really great inspiration for creating projects. You can make it as spooky as you want. For this project I wanted to combine Halloween with Steampunk. Both are favorites sources of inspiration of mine. So why not combine?
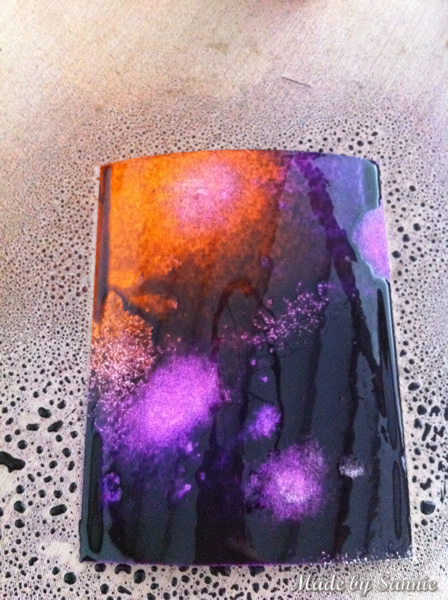
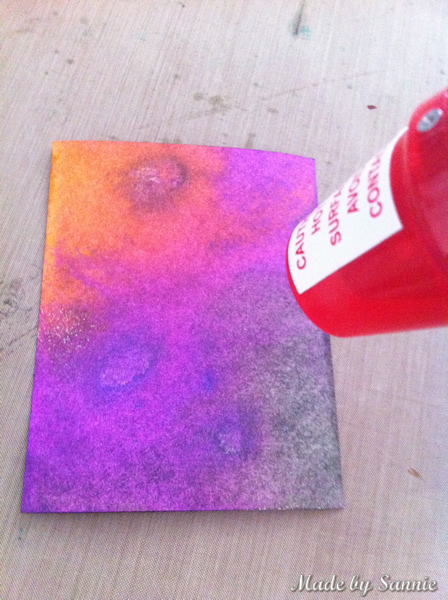
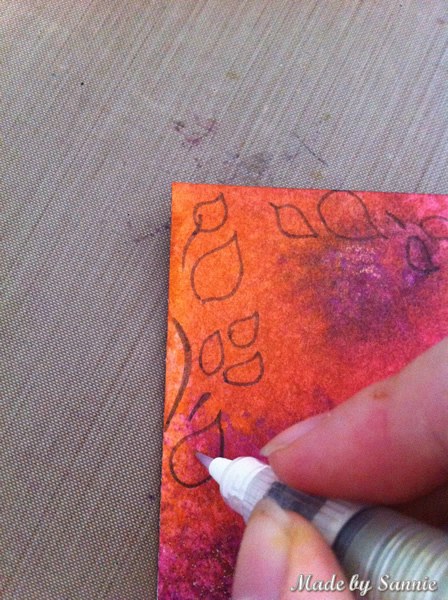
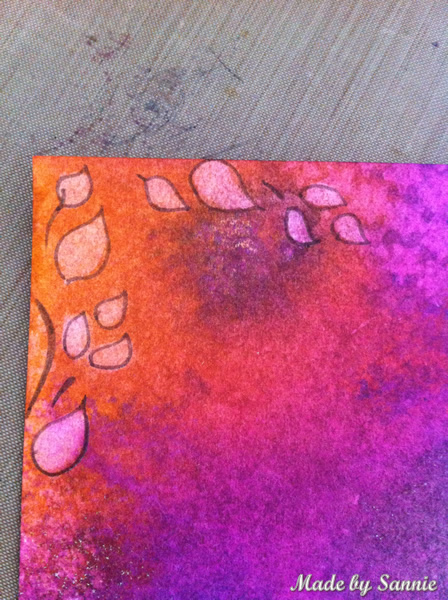
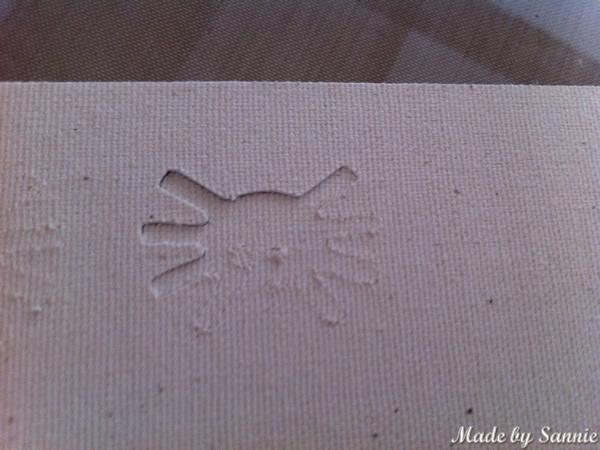
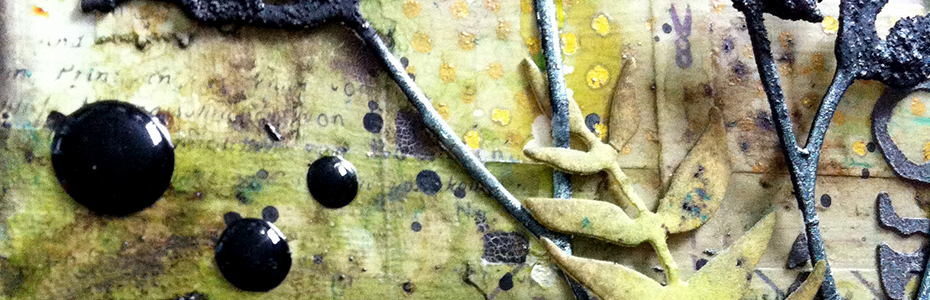
With this tag I participate in the Compendium of Curiosities Challenge 2 from Linda Ledbetter. We were told that we had to open the book on page 41. Here can the Kraft Resist technique be found. Tim has done a video about it recently. Click here to watch it.


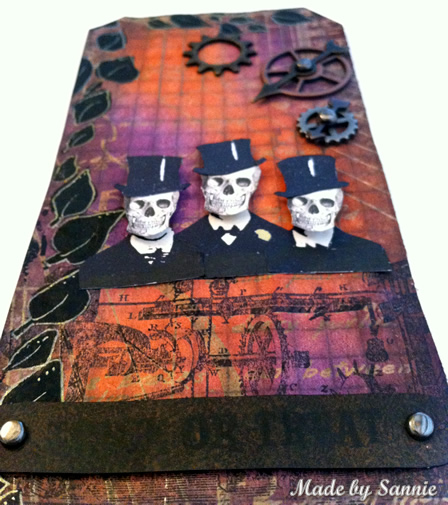
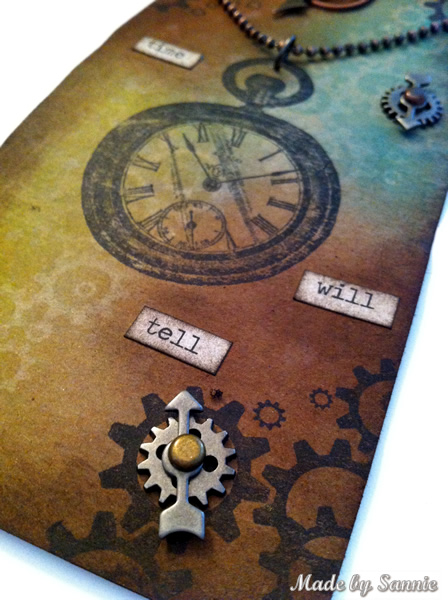
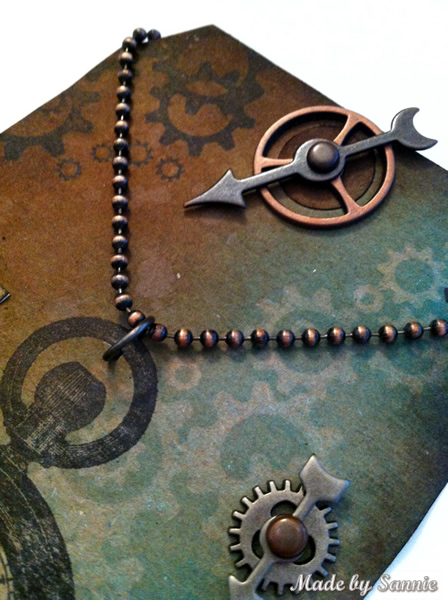
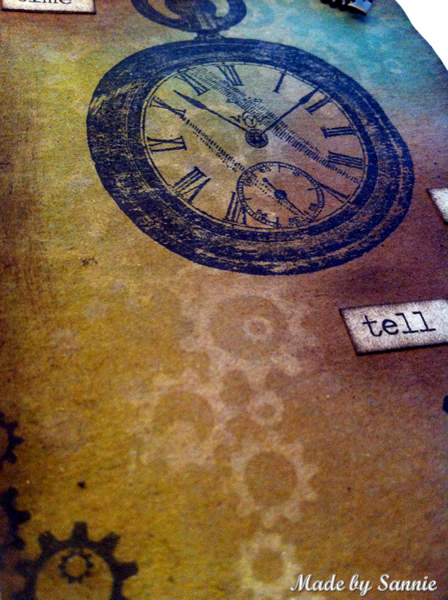
The Kraft Resist background I covered with some Picket Fence Distress Stains, so that the background will be lighter and the Fall Distress Inks keep their beautiful color. When I think about Steampunk I think of the stamp with the 3 gentlemen. Since my theme is Halloween, they had to play their part and I gave them a skull instead of their own heads. This skull is exactly the same as the new stamp from Tim. I actually bought this image as a pattern in the Silhouette Store. It is probably a general image...

As I forgot to mention, I'm also joining in at Frilly and Funky, as their challenge is resist it!


Thank you for stopping by! Love to see you next time!

Hugs,
Sandra

Monday, August 27, 2012

Sweet Summer Distress

Hi everyone,

Isn't summer the greatest season of the year? Hmm, well here in the Netherlands, the weather this summer hasn't been that good, but fortunately the past few weeks were super...  But with this weeks challenge for Simon Says Stamp and Show, we get to create summer with the Limited Edition Summer Distress Inks! Aren't the colors gorgeous?! My favorite of the 3 is the Picked Raspberry! I love that bright pink! If you don't have these Distress colors, don't worry, you can also use simular colors or even completely different colors. As long as it's inspired by the summer!

Although I really like these colors, I chose to tone them down a bit. They are very bright and I wanted to create a lovely soft summery day. I did this by using the Wrinkle Free Distress technique. In other words swiping the inkpad directly over your craft sheet and spraying it with some water.  Then I mixed the Picket Fence Stain through it with a brush and spread it out so that the ink is not one big pool, but a bit scattered. This I have done for each color, and quite near to each other so that the colors blend into each other nicely. Now it was time to go create the background, so I pressed a piece of Neenah Solar White cardstock into the ink. To prevent that it becames a muddy mess I heated it with the heat tool between each layer of ink. This I repeated several times until I was satisfied with the result.


The birdcage I painted with Snowcap Paint Dabber and to age it a bit I've used Espresso Paint Dabber. The ribbon is done with the same technique as the background, minus the Picket Fence Stain.


To join in all you need to do is make a project that fits this weeks challenge and you can be the winner of the $50 gift voucher that our amazing sponsor Simon Says Stamp offers. This prize will go to a random entry. So go over to the Stamp and Show Challenge blog, let the DT members inspire you and join in the fun!

Thank you for stopping by! Love to see you next time!

Hugs,
Sandra

Thursday, August 23, 2012

Time will tell

Hi everyone,

It's time for a new Compedium of Curiosities challenge! The technique of this week can be found on page 47 and is called Whitewash Stamping. This technique I haven't done before and it's easier than I thought. Very surprising that it works like it does. I've kept the tag fairly simple because else the technique would literally fade into the background. Thank you Linda for another fun challenge! Last but not least, this week is sponsored by The Funkie Junkie Boutique!


Thank you for stopping by! Love to see you next time!

Hugs,
Sandra

Monday, August 20, 2012

No rules, let's PARTY!

Hi everyone,

Can't believe it's Monday already and with a new Monday we have a new Simon Says Stamp and Show challenge! This time there are no rules, anything goes! Super cool and totally fun to let loose and do your thing! Let's get the party started!
Finally I got the pictures of my parents surprise party from two cousins ​​of mine. It was such a wonderful day and I wanted to display the photographs and create something that wouldn't be tucked away in a closet. This frame I had laying around and it was perfect for what I had in mind. Because it is an album, I will show just a few pages of it, the ones which I like most, and tell you more about them.


First I sanded the plastic frame and painted with white paint dabbers. To give it a bit of an depth I've used some silver paint. Then I thought it would be better to cover the frame with tissue tape. And I was right... Well at least I think so..


As the cover I've used a piece of transparant sheet and embossed it with the Collage embossing folder. The weathered clock is from die cut from grunge paper and I painted it completely black. Then covered it  with some Tattered Angels Glaze. I really love that glaze! It makes everything shimmer! Lets see, now for the centerpiece of the cover. Yes, I didn't want lots of text, I wanted only to show the number of years my parents where married. The search for the perfect font began. After a while looking at different fonts I didn't know what I wanted anymore and it all became a blur. So I picked a big and bold one. I let my Silhouette cut it out for me from Neenah Cardstock. And distressed it with Distress Ink and the Grid stamp from Kaisercraft. The wings I've colored with a water brush and Distress Markers. I love coloring that way! I wanted to add something more to the cover. Then I saw the Maya Road Bingo numbers, luckily I had the right numbers so I spelled the date of the surprise party!


All the pictures I've edited on my iPhone with an app and printed it by a local photo shop.
On this page is a picture of my parents all flabbergasted. Hilarious, don't you agree? The background is made with a Mr. Huey template and different colors of distress ink. The letters are from the decorative strip Inside Out. They both turned 65 years, this year...


This is a page with a picture of me, looking all happy. I've kept this page very simple. As a base I used Neenah Dessert Storm cardstock and stamped the background with the mixed media stamp set from Tim Holtz. Then darkened edges with Distress Ink and sewn a border all the way around. The flourish die cut is a mover and shaper and it also has a beautiful aqua shine. On the bottom edge I've used the on the edge die.


On this page I've placed two identical photographs (of my sister, she really dressed up for the occasion, we all had to look twice to recognize her!) which are different sizes. So nice when there are no rules! Here I used the outer edge of the inside out die.


When making an album with lots of pages, you need lots of supplies. Well, I do! Below the mega long supply list of the materials I used for the whole album!


To join in all you need to do is make a project that fits this weeks challenge and you can be the winner of the $50 gift voucher that our amazing sponsor Simon Says Stamp offers. This prize will go to a random entry. So go over to the Stamp and Show Challenge blog, let the DT members inspire you and join in the fun!

Thank you for stopping by! Love to see you next time!

Hugs,
Sandra

Friday, August 17, 2012

Halloween is just around the corner

Hi everyone,

Halloween seems so far away, but it will be here sooner than you expect. It's one of my favorite themes for projects. Too bad we don't celebrate it here in the Netherlands. To enjoy it as long as possible, I start with it early! And today my first Halloween card of the year. Yesterday I bought a few Dylusions Sprays. I don't have them all yet, but that is just a matter of time. LOL! Luckily I had the right colors for a Halloween background.


Just a few pictures of how I made this card....

As base I used watercolor paper. This goes perfectly with the Dylusion sprays. I removed the excess with a roll of paper towls and dried it with the heat tool.


I just love my new stencil and I made a small ​​leaves border with it. And with a water brush I lightened the color of the leaves. Awesome technique!
Then I created more layers ​​with stencils and paint and with stamps and ink. The letters "Happy Halloween" are printed with my printer (yes, I really did that) and then decorated it with a white pen.


The spider is from Sticky Back Canvas and is cut out with my Silhouette and the skull and the bats are cut out of paper.

With this card, I joining in the fun with Frilly and Funkie, where the challenge is to use canvas. Which my little spider is made of.


Thank you for stopping by! Love to see you next time!

Hugs,
Sandra

Tuesday, August 14, 2012

CoCC #17

Hi everyone,

What a wonderful vacation I'm having so far! Just hanging around in my craft room and ordening things. Now and then a few days away on a city trip. Two weeks back to Paris and next week to Maastricht. But now it's time for Compendium of Curiosities 2 challenge. I'm having so much fun with these challenges, and I've never missed a single one yet! This week Linda lets us open the book on page 61 for Creative Core'dinations! How awesome is it that this week the challenge is sponsored by the generous Simon Says Stamp!
Talking about generous, I recently received this awesome stamp set from Sandy and I wanted to use it ASAP! Thanks again Sandy! You are such a sweetheart! This card is for you! Hope you'll like it!


Thank you for stopping by! Love to see you next time!

Hugs,
Sandra

Monday, August 13, 2012

Perfect Distressed

Hi everyone,

It is Monday again and that means a new challenge at Simon Says Stamp and Show. This weeks challenge is to show your favorite technique in your project. I have too many favorites techniques... So it was hard to pick only one. But I've managed to pick a perfect technique, Perfect Distress by Tim Holtz. It's so amazing when the ink starts to wick underneath the perfect pearls!

 
This challenge is a great opportunity to show you how I've made this tag. So let's see what I've done!


As base for the background I've distressed the tag with light distress colors. It is very important that the tag is completely dry for the next steps. In order to be sure, heat set it.


By accident I noticed that when you put VersaMark on the stamp first and then Distress Ink, you'll get a better print. Although it has a side effect for this technique. I'll get to that later.


Quickly cover the stamped surface with Perfect Pearls with a small soft brush. Once you have covered everthing, pound lightly over it with a bigger soft brush so the Perfect Pearls will stick better. Brush the excess Perfect Pearls off.


Mist some water on the tag and see what happens! Dry the tag with a heat tool. It runs even nicer when you do not use the VersaMark trick. The versamark holds the distress ink slightly in place.


Distress the tag with some distress ink. I often use sponges when I want to make some stains. When making the stains some of the Perfect Pearls will come off, which adds to the distress look!


To  stamp over the Perfect Pearls I used Archival Ink. It gives a very nice effect. To make the ink droplets, the screw cap off and tap with your finger on the top of the sprayer. 


Mist the ribbon with some water, this makes beautiful color differences in the ribbon. To give the ribbon a metallic shine, mix Distress Stains with some Perfect Pearls. Wrinkle the ribbon into a little ball and heat set it. This keeps the wrinkles in the ribbon. Attach it to the tag.


To color the film ribbon, use Alcohol Inks and blending tool. You can give it multiple layers to make the color more intense. And attach it to the tag by using the Tiny Attacher.


Attach the mini gears by using the Craft Pick, and for example, a foam surface.

Add some more embellishments if you wish. And the tag is finished!
Hope you've enjoyed this little tutorial. If you have any questions about it, please let me know!


To join in all you need to do is make a project that fits this weeks challenge and you can be the winner of the $50 gift voucher that our amazing sponsor Simon Says Stamp offers. This prize will go to a random entry. So go over to the Stamp and Show Challenge blog, let the DT members inspire you and join in the fun!

Thank you for stopping by! Love to see you next time!

Hugs,
Sandra

Wednesday, August 8, 2012

12 tags of 2012 August

Hi everyone,

What an amazing tag Tim Holtz made ​​for the 12 tags or 2012! This is one of my favorites! I've combined this tag with the Compendium of Curiosities challenge. Can't believe how time flies! Last week I was in Paris, this week and I'm back home! Have had an awesome time and saw much that I had never seen before. Such as the Catacombs! That was so bizarre but so cool at the same time! Very impressive!


Anyway, now back to the tag. I had so much fun making this tag. Everything went smoothly. I must confess that I've taken the cameo pendant from my Configuration box, because I just had to have it on this tag! The Configuration box will be filled with something I've brought from Paris. So everything is allright ;). The Perfect Pearls Mist technique goes perfectly with this tag! I have used an oval difuser, but I can not manage to get nice impression with them. Not sure what I'm doing wrong, so just cut out some ovals as the frame. I don't have the Tattered Pinecone Die, therefor I used a SVG file from Lettering Delights and cut it with my Silhouette.


Thank you for stopping by! Love to see you next time!

Hugs,
Sandra